Tuesday, November 16, 2010

Happy Holidays

Before the holidays I was in Paris for four days. At Julie's sweet home it was a heaven of cheese and wine and many other things such as friendship, babies and salted butter. Can anything be better than salted butter, please tell me.


And Iznik for the holidays. Nice sunsets and again delicious food everywhere.


Friday, November 12, 2010

Pumpkin Soup


From now on I declare it officially autumn. It's time to eat soup in the evenings, stay home with pyjamas till noon on week-ends, going to movies, walking around the city and stopping for a steaming cup of coffee and reading a brilliant novel... After all, it's time to return to old habits and eat comfort food at home.
Although it is still indian summer in Turkey ( called "pastırma yazı" in turkish, meaning literally salami summer ) for me fall begins in november. 
Soup is my all times favorite comfort food. There is this gingered chicken broth and noodle soup that we are cooking quite often with my beloved which this year already took over the adored lentil soup's thrown. But those two recipes will come another time. Today it is pumpkin soup.


I tried pumpkin soup in various places quite a few times so far and kept telling my self to do it. I've been collecting recipes, making plans, thinking of special occasions where I can make it and finally I have decided to have pumpkin soup for our traditional Christmas dinner ( which as you can understand is itself nothing but traditional). And once the decision was made I started the trial runs. 
After careful considerations I picked the recipe form "le cook book" (or for those of you who prefer the original english version "The soup book" ).


I modified the original recipe a little bit. First of all I have not used the fried sage leaves ( for two reasons: I happen to not have fresh sage leaves at home at all moments and also I was not quite sure that crispy leaves on top of my soup will be good).  Second modification was the curry which suited elegantly the sweetness of pumpkin.

Ingredients

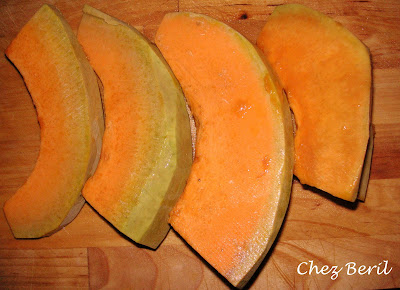
1kg of pumpkin, peeled and deseeded
2 small potatoes, peeled
1 knob of butter
2 tablespoons of olive oil
1/2 tablespoon curry 
ground black pepper
salt


Chop the pumpkin and the potatoes into small cubes and stir them in a large pot for about 5 minutes. Add boiled water ( or better vegetable broth ) and cook until the vegetables are tender. Use a hand blender to blitz the soup until you have a silky consistency. Season bit by bit by salt and pepper while tasting and add the curry.


PS: You can freeze this soup and have it in your freezer for lazy nights up to 3 months.

Bon appétit!!

Friday, November 5, 2010

Chicken with Parmesan and Basil

I think this is the first time that I start writing a recipe just after eating the dish. It was so good that I couldn't wait. I had to share it. Also I am pretty much sure that you'll agree with me once you try it.


Ok, enough bragging about myself. But it was just such a simple dish that it is surprising that it can be so delicious.

Ingredients

400 gr of chicken breast ( cut in half through so that you'll have approximately 6 thin pieces)
1 large plum tomato (or 2 to 3 regular, juicy tomatoes)
3 tablespoons of red wine
2 gloves of garlic, finely sliced
3-4 basil leaves, finely sliced
parmesan cheese ( not grated but sliced, enough to cover the top of the dish )
salt and pepper

A notice about the basil before starting the recipe. You can easily grow it at home, in your kitchen and believe me it makes all the difference to sparkle some fresh leaves over any dish.


So, first turn the oven on to 200 degrees. Boil water in your kettle. Cross the back of the tomato. Put in the boiled water for 1 minute and then in cold water for 1 minute ( or just running tap water) so that you can easily take its skin off.


In a skillet heat 3 tablespoon of olive oil, add the garlic. Put salt and pepper on chicken breasts and cook them in the skillet. At this point you have to be careful not to let them dry. Once cooked, transfer the chicken breasts to a about 10 cm deep ovenproof dish.


In the same skillet that you used for cooking chicken breasts you are going to prepare the tomato sauce. Slice finely the tomato and transfer it to the already hot skillet. Add the red wine. Cook for at least 15 minutes. Taste for the seasoning. It should be juicy with a nice dark red color.  Towards the end add half of the basil leaves.


Pour the sauce on top the chicken breasts. Add the resting basil and cover the top with parmesan slices. Again a warning about the parmesan. Please, please , please never buy previously grated cheese. It has to be grated or sliced freshly. You'll see the difference. So don't go lazy on cheese.


Cook in the oven until the cheese is melted and have a partly brown color.


Bon appétit!!

Monday, September 6, 2010

Fresh pasta at home!


Last year I have tried with some of my very courageous friends to make home-made pasta. Well, the result was a very delicious ravioli dish and aching arms for several days. No need to say that I was a bit hesitant about doing fresh pasta again without a rolling machine. So no more delicious fresh home-made pasta until last week, where I bought (finally!) a pasta-machine on the internet. 

So Saturday I tried my first home-made pasta and I have to say that it was a big success! It’s nothing like dried pasta, I will not dare to say it’s better or compare them but it is different and it is so good! We only tasted it with freshly made pesto for now.


To prepare the dough for pasta, you need to count 100gr of flour and 1 egg per person. I prepared for 3 with 300gr flour and 3 large, free-range eggs. In Italy, pasta can only be prepared with durum wheat flour according to law. Moreover, Durum flour and as a result pasta, as we know it today, has been introduced to Italy by Arabs, during their conquest of Sicily in the ate 7th century. 

Let’s return to the preparation of pasta dough. First you need to mix the eggs with the flour until it looks like breadcrumbs. I did this in a food processor but you can do it by hand as well. Than you need to knead the dough. Kneading is not the easiest thing but there is no need to dread it either. You have to squash the dough a lit bit, reshape it, pull it, stretch it, etc. You can stop when the dough starts to feel and look smooth and silky. Wrap the dough in a clingfilm and let it rest for half an hour in the fridge. 


The next step is to roll your pasta. Take a piece as big as an apple from your dough. First you need to start with the widest opening of your machine. Roll your dough through it, dust a little bit with flour and go on with the next setting. The trick to obtain smooth and rectangular shaped pasta sheets is to fold the pasta in two at this point and go back to the widest setting again. You should repeat this cycle for 5 to 6 times for even better results. The next thing to do when you are satisfied with your pasta is to go one by one to the smallest settings. I stoped at the 4th one for chunky bites of tagliatelle.


At this point you can stop and shape your pasta either with the machine or with a knife.  I prepared some tagliatelles, as I sais, with the machine and cooked them only for 3 minutes! They were delicious! So a final word for fresh pasta: totally worth the effort!

Bon apétit!

Monday, August 23, 2010

Menemen


I love this classic Turkish dish. It is usually eaten at breakfast (unless you're a single guy living alone and knowing only to make eggs cause until now you only have eaten your mom's food!!). This Sunday we went out for breakfast and ordered a menemen. Unfortunately this was a bad call. There was too much grease and tomato paste on it.  Definitely not good for my taste in breakfast… So this morning I wake up again to the idea of menemen, thinking how I can make this dish simpler with a more elegant presentation.
The dish consists originally of tomatoes, peppers, onions, butter and eggs. I love butter on top of my toast but I used olive oil for my menemen and I seriously don’t like onions when I just wake up. Hence my recipe is not exactly the original but just simpler… The servings are also per one whereas the original recipe comes to table in the skillet and is shared by everyone there.


Ingredients
1 medium tomato
3 or 4 red peppers
2 gloves of garlic
2 free range eggs
Salt, pepper
Dried chili

Put 2 table spoon of olive oil in a medium size skillet and add the garlic cloves. No needs to peel or chop since you are going to remove them once they have given their taste to the oil. Cut the peppers in half and remove the grains with the tip of a sharp knife. Slice the peppers thinly and transfer them to the skillet. Peel the tomato and chop it roughly. After 4-5 minutes add the tomatoes to the skillet and cook for 5 more minutes. Don’t let the tomatoes cook too much and become a purée. Season with salt, pepper and dried chilies. Transfer to an individual porcelain tart pan. Add the 2 eggs without disrupting the yolks. Cook in the preheated oven for 5 minutes. The whites should be firm while the yolks remain silky.  I used the maximum heating setting from the above.
Bon appétit!

Tuesday, August 17, 2010

der Flammkuchen - La Tarte Flambée


In German "der Flammkuchen", in French " la tarte flambée " and finally in Alsatian " Flammekueche"..

Meaning: baked in flames...
It's a traditional dish from the Alsace region of France made originally with bread dough because it was used to check out if the heat of the wood burned ovens were good for bread making!

The original recipe is made of creme fraiche, lardons and onions although many varieties can easily be found today in the region.

I used a simpler dough made with yogurt and unfortunately no lardons or any kind of bacon was easy, if not impossible, to find in Turkey so I baked two tartes. One with only cheese and onion and one with ham on it. They were both really great!

I am already thinking repeating that recipe in winter with leeks and finely sliced Turkish chorizo on it.


Ingredients

For the dough


180gr flour
120gr yogurt
60gr butter

 
1 red onion, finely sliced as croissants
3 or 4 slices of ham
2 tablespoon of cream cheese
1 tablespoon of cream
Salt-pepper
Nutmag
Chives or spring onions

Sieve the flour and salt on to a large salad bowl. Cut the cold butter in small cubes and mix with the flour with your fingers until it feels like breadcrumbs. Make a well in the middle, add the yogurt and mix together untill smooth. Wrap the dough with a clinge film and refrigerate for at least 30 minutes.
Mix the cream cheese, cream, salt, pepper and the grated nutmeg and stir well.
Roll the dough on clean surface (don’t worry about the shape) and but it on greased and floured oven tray. Smear your cheese sauce evenly over the dough. Lay over your onions and ham slices. Drizzle with olive oil and season with salt and pepper.
Cook until crisp and golden and let it cool in the oven. Sprinkle your finely sliced spring onions and squeeze a small amount of lime juice on top for an extra touch of freshness.
Eat warm or even cold the next day!


Bon Appetit!!!

Thursday, August 5, 2010

Chick Pea Summer Salad with Bulgur Rice with Herbs: Perfect Lunch Combo!


I don't like to have lunch everyday in some fast-food or -quick restaurant where I have to pay a fortune for a salad. Especially salads are the most annoying meals. They usually are boring, no creativity, nothing , not well seasoned and overpriced. The result is quite often disappointment or an over budget meal. 

So I prefer to prepare my lunches at home  and put them in small boxes at least 2 to 3 times a week. In winter, the boxes contains mostly salads prepared with a variety of winter legumes and dried beans or sandwiches. In summertime I like to add a bit more colour to them, use more summer veggies.

I always loved chick peas. They are tasteful, full of proteins, zinc and follic acid and many other things that are good for you. My mother makes this great humus dish that I can't get enough of. (I'll maybe share the recipe with you some other time). For lunch I think they are perfect, they keep you full until dinner and give you energy. Inspired by this salad recipe form Jamie's Dinner I've done a chickpea summer salad which was a delicious and so quick and easy to prepare!

Ingredients
400gr of chick peas ( you can buy them in a can or put them in water the night before and cook them yourself)
2 red peppers, grilled on top of the stove and roughly sliced
3 spring onions, finely sliced
5-6 cherry tomatoes
a handful of fresh mint
1/2 lemon juice
Extra virgin Olive oil
dried red chili
salt and freshly ground black pepper


Mix red peppers, sliced onions and cherry tomatoes in a bowl. Add the lemon juice and olive oil. Meanwhile, heat water in a saucepan, drain the chickpeas and put them in the boiling water just for a few minutes. It's not for cooking them but to heat them slightly so that they will incorporate better with all the juices in the salad. Season to taste with salt, black pepper and dried red chili. Dress with the fresh mint. 


I took some bulgur rice cooked with fresh herbs and olive oil and a few fresh green nectarines with this salad for lunch today and it was great!


You can also add many other fresh herbs to this salad such as basil or parsely.

Bon appetit!

.